
Build a semantic segmentation dataset
Unofficial preview. Docsbook assembled this page from the public
wkentaro/labelmeREADME.mdandexamples/directory. It is not affiliated with, endorsed by, or maintained by the Labelme project. The official documentation lives at labelme.io/docs.
Semantic segmentation labels every pixel with a class and does not distinguish one object from another of the same class. Two overlapping cars are simply car pixels. This is the examples/semantic_segmentation workflow.
Annotate the directory#
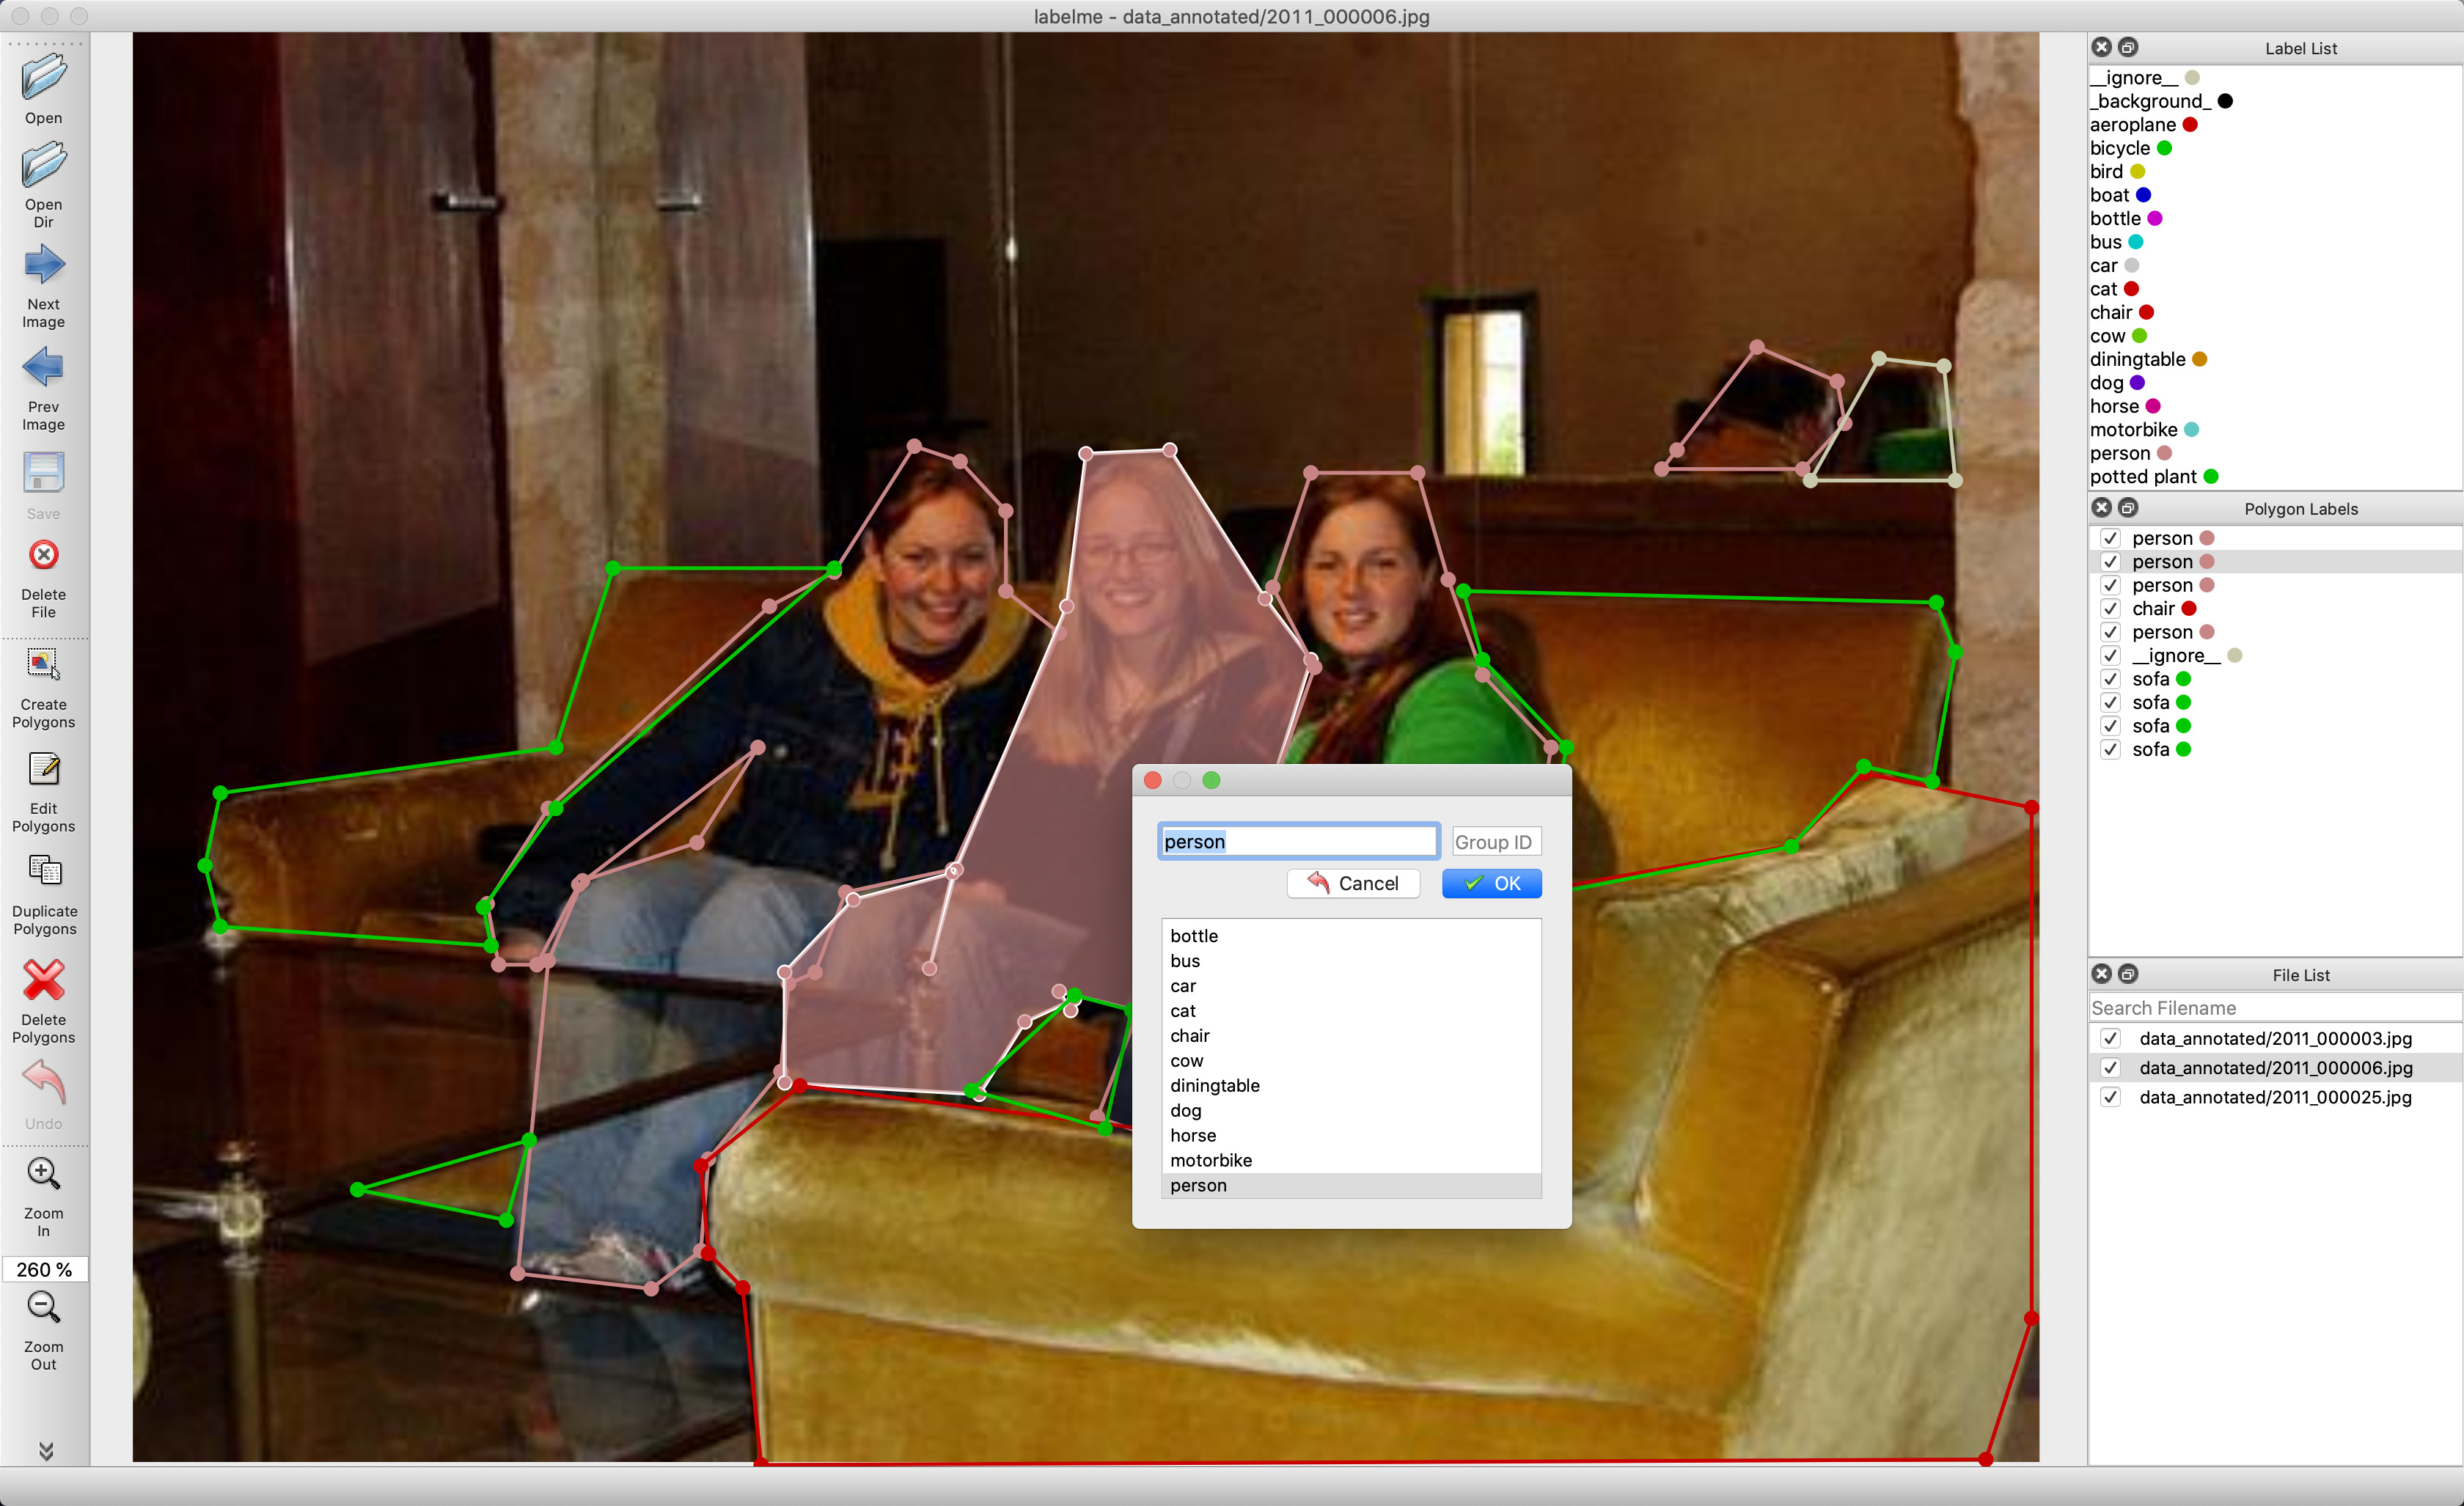
labelme data_annotated --labels labels.txt --validate-label exact \
  --config '{shape_color: {mode: auto, auto: {shift: -2}}}'
--validate-label exact rejects any label outside labels.txt, which matters more here than anywhere else: a stray class name becomes a stray channel in every mask you generate afterwards. The inline --config shifts the automatic per-label colours so adjacent classes are easier to tell apart while drawing.
Export class masks#
./labelme2voc.py data_annotated data_dataset_voc --labels labels.txt --noobject--noobject is what makes this semantic rather than instance segmentation: it skips the per-object outputs and generates class-level masks only.
| Directory | What it holds |
|---|---|
data_dataset_voc/JPEGImages |
The source images |
data_dataset_voc/SegmentationClass |
Class-index PNG masks |
data_dataset_voc/SegmentationClassNpy |
The same masks as numpy arrays |
data_dataset_voc/SegmentationClassVisualization |
Colourised masks for checking |
Why the mask looks black#
The label files contain only very low values such as 0, 4, 14, because those are class indices rather than brightness levels. The value 255 marks the __ignore__ label, which is -1 in the npy file.
Render one properly with the tutorial helper:
../tutorial/draw_label_png.py data_dataset_voc/SegmentationClass/2011_000003.png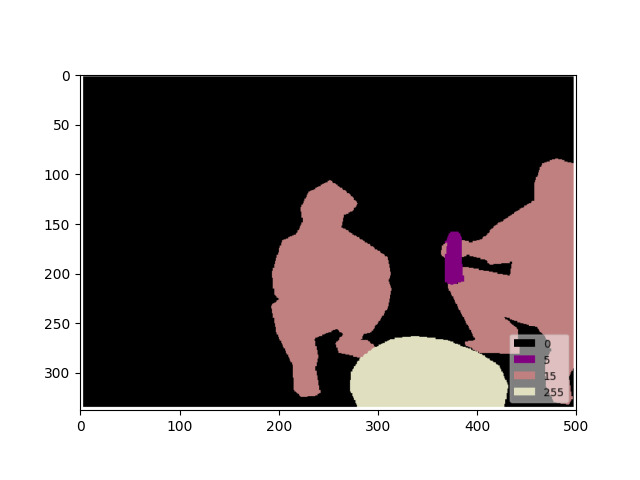
Related#
- Instance segmentation — the same annotations, separated per object
- Export to Pascal VOC — every output directory the script can write
- Core concepts — why
group_iddecides which of the two tasks you get